Antifouling is a critical aspect of boat ownership, impacting performance, maintenance and, importantly, the health of our marine environment. This comprehensive guide provides expert advice on effective antifouling application, minimising ecological impact and understanding the fundamental principles of antifouling.
Understanding Antifouling: What’s the Big Deal?
Fouling occurs when marine organisms like algae, barnacles and mussels adhere to submerged surfaces, most notably a boat’s hull. These organisms form biofilms, which can rapidly develop into thick, unsightly layers. Beyond the aesthetic issues, fouling significantly impacts a vessel’s performance and can even damage the hull itself. Furthermore, the transfer of invasive species via fouled hulls poses a serious threat to marine ecosystems worldwide.
Why Antifouling Matters:
More Than Just a Clean Hull
The importance of antifouling extends beyond simply keeping your boat looking clean. Here’s a breakdown of the key benefits:
1. Fuel Efficiency: A fouled hull creates significant drag, forcing the engine to work harder and dramatically increasing fuel consumption. Studies have shown that even a relatively small amount of fouling can increase fuel usage by as much as 30%. This translates directly into higher fuel costs and increased CO2 emissions, contributing to climate change.
2. Performance: Fouling directly impacts a boat’s speed and overall performance. The added drag reduces manoeuvrability and top speed, which is particularly critical for racing sailboats or any vessel where performance is a priority.
3. Maintenance and Durability: Persistent fouling can cause significant damage to a boat’s hull. The weight of the fouling organisms can stress structural components, and some organisms can even corrode or penetrate the hull’s protective layers, leading to costly repairs and a shortened lifespan for your boat.
4. Environmental Responsibility: While fouling is a natural process, the unintended transfer of invasive species via fouled hulls represents a major ecological threat. These “hitchhikers” can disrupt the delicate balance of local marine ecosystems when introduced to new environments, often outcompeting native species and causing significant ecological damage.
The Antifouling Process: A Step-by-Step Guide to Success
1. Hull Preparation: Setting the Stage for Success
Thorough hull cleaning and preparation are essential for proper antifouling adhesion. Any contaminants left on the hull will compromise the bond between the antifouling paint and the hull surface, reducing its effectiveness and longevity.
Removing Old Antifouling: If your boat has existing antifouling, it must be removed before applying a fresh coat. Several methods can be used including scraping, power washing, or chemical stripping. For particularly stubborn coatings, a biodegradable paint remover is recommended.
Environmental Tip: Dispose of old antifouling waste and any chemical products responsibly at designated disposal facilities. Never dispose of these materials in regular bins or by dumping them into the water.
Washing and Degreasing: After removing the old antifouling, wash the hull thoroughly with a biodegradable cleaner or degreaser. Use a soft brush and plenty of fresh water to remove any remaining grime, algae or salt build-up. This step ensures that all contaminants are removed, leaving a clean surface for the new antifouling to adhere to.
Environmental Tip: Always use eco-friendly cleaning products that are specifically designed for marine use. Clean your boat in designated areas with proper drainage systems to prevent any wastewater from flowing into local water sources.
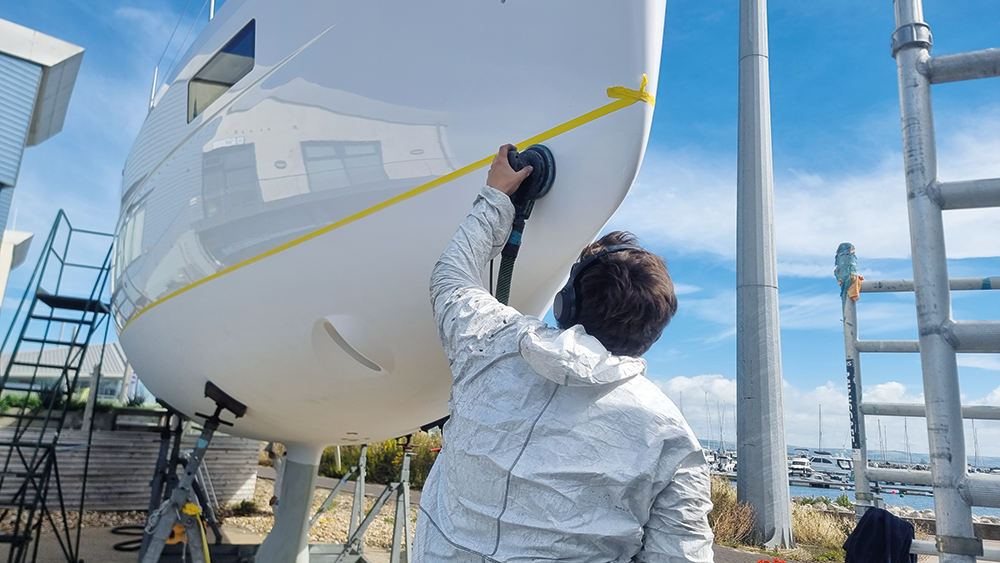
Sanding: Sanding the hull creates a smooth, slightly rough surface that the antifouling paint can bond to effectively. Use 80-120 grit sandpaper for this process. The goal is to remove any remaining loose particles and roughen the surface slightly without going too deep and damaging the underlying layers of gelcoat or paint. If you are simply reapplying antifouling over a previously painted hull, a light sanding is sufficient.
Environmental Tip: Use a vacuum sander with dust collection to prevent sanding dust from contaminating the environment. Dispose of sanding dust responsibly, following local environmental regulations.
2. Priming: Enhancing Adhesion and Longevity
Applying the correct primer is crucial for maximising the effectiveness and lifespan of antifoul. The primer creates a strong base for the antifouling to adhere to and preventing it from peeling or flaking.
Choosing the Right Primer: Select an epoxy-based primer that is compatible with the type of antifouling paint you plan to use. Apply the primer evenly across the hull using a roller or brush. Avoid over-applying, as thin, even coats are more effective than thick, uneven ones.
Environmental Tip: Choose low-odour, water-based primers whenever possible, as these are less harmful to both you and the environment. Work in a well-ventilated area to minimise your exposure to fumes.
Curing: Allow the primer to cure completely before moving on to the antifouling layer. Follow the manufacturer’s recommended curing times, which are typically 4-6 hours for epoxy primers. This step is essential for ensuring that the primer has fully hardened and is ready to receive the antifouling paint.
Tip: Check the weather forecast and avoid applying primer or antifouling if rain or high humidity is expected, as this can negatively impact the curing process.
3. Antifouling Mixing and Preparation: Getting it Right
Properly mixing the antifouling product is essential for ensuring that it will perform as intended. Many antifouling paints come in two parts – a resin and a hardener – that need to be mixed in exact proportions.
Accurate Proportions: Carefully follow the manufacturer’s instructions for mixing the two components. Use a clean container and stir the mixture thoroughly for at least 3 minutes to ensure that the hardener and resin are fully blended.
Environmental Tip: Mix only as much antifouling paint as you need for the job to avoid wasting any leftover product. If you are unsure of how much to mix, it is always better to err on the side of caution and mix a smaller batch. Leftover antifouling paint should be stored in an airtight container or disposed of safely according to local regulations.
Avoiding Overworking the Product: Once the two components are mixed, most antifouling paints have a limited pot life (working time), so it is important to apply the paint within the recommended timeframe.
Tip: Work in manageable sections, and only mix enough product that you can apply within a few hours. This will prevent the paint from hardening before you have a chance to use it.
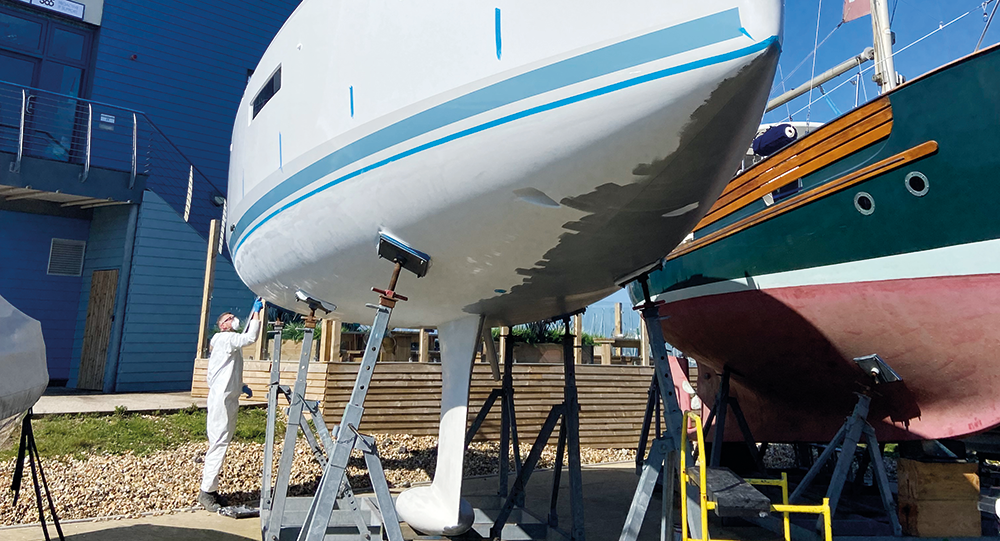
4. Applying the Antifouling: Achieving Even Coverage
Application of antifouling paint requires careful attention to detail to ensure even coverage and complete protection.
First Coat: Apply the first coat of antifouling paint using a brush, roller or spray, depending on the type of product and your personal preference. Use smooth, consistent strokes to avoid uneven coverage.
Tip: Work in sections to maintain control over the application process. Avoid applying thick layers of paint; multiple thin layers are generally more effective for durability and long-term performance.
Environmental Tip: Avoid overspraying and apply only the amount of product needed for each section to minimise waste. Work carefully to ensure that you are not applying antifouling paint to areas that do not need it, such as propellers, anodes or areas above the waterline.
Second Coat: After the first coat has dried (usually 4-6 hours), lightly sand the surface with fine-grit sandpaper (around 220-240 grit) to improve adhesion before applying the second coat.
Tip: Sand lightly, just enough to break the surface tension and remove any rough spots. Once sanded, wipe down the hull with a clean cloth to remove any dust before applying the second coat.
Environmental Tip: Ensure that all sanding waste is collected, vacuumed and disposed of responsibly.
5. Curing and Final Inspection: The Final Steps
Proper curing of the antifouling paint is crucial to ensure that the product bonds correctly and performs as expected for the full season or longer.
Allow Proper Curing: After the final coat of antifouling paint is applied, allow it to cure completely before launching the boat. Cure times vary by product, but typically it will take 24-48 hours for the product to dry fully, with full curing taking up to 7 days.
Tip: Do not rush the curing process.
Be patient and ensure that the antifouling paint has hardened completely before exposing it to water.
Environmental Tip: Store the boat in a dry, well-ventilated area to allow the product to cure properly. Avoid launching the boat in wet, rainy conditions, as this can negatively impact the curing process.
Final Inspection: Once the antifouling paint has cured, perform a visual inspection of the hull to ensure that the paint has been applied evenly and covers the entire hull.
Tip: Look for any missed spots or thin areas that may need touch-ups. If you notice any areas that need more coverage, lightly sand the area and reapply the antifouling paint
In associattion with

To find out more visit www.boatcare.co.uk